IMPORTANT, go to end of article for important 2024 update on how to run old java code
Now that we have installed Eclipse with Java, JavaEE and PyDev perspectives in our previous tutorials (see end of this article for IMPORTANT 2024 Eclipse installation update), we will now move on to working with SQL (Structured Query Language). There is no need, as a beginner, to download packages like MySQL or SQL Server. I will show you an easy way to get introduced to SQL just by embedding SQLite into Eclipse. This way we can write java code to create tables, insert and update data all within a current Eclipse project. You will soon discover if there is further interest and then can pursue other sophisticated methods to use SQL later on in your studies.
Keep this file opened for instructions and open a second browser
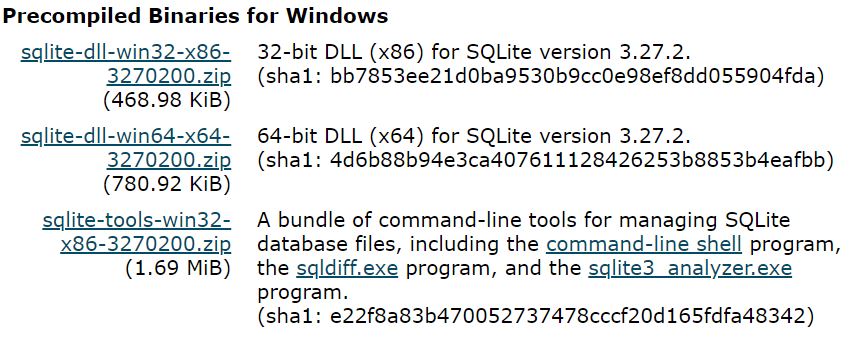
Go to this site and download the Precompiled Binary for Windows called
sqlite-tools-win32-x86-3270200.zip
https://www.sqlite.org/download.html
Next open the zip file we just downloaded and locate the sqlite3 file. We will copy this file into a new folder that we need to create

this is what the zip file looks like when opened
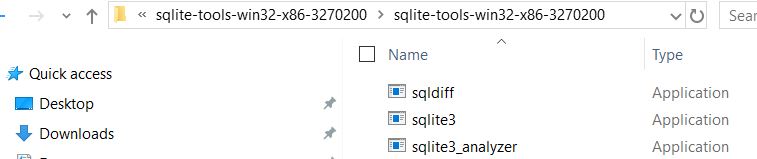
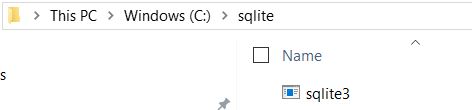
Create a new folder called c:\sqlite and copy the above sqlite3 file into the folder
Then type cmd into windows search to open a command prompt and change directory to c:\sqlite and then type sqlite3 test.db and press enter. We see the following:
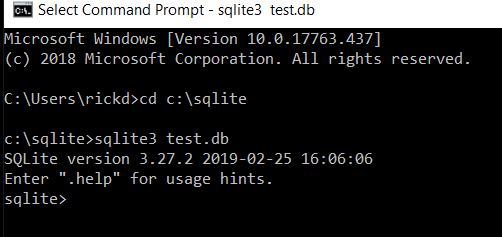
We have just created a database aka schema in sqlite with a database called test. For now close out the command prompt window and we will reopen it later in eclipse.
Create a new project in Eclipse with a plain java class and a main method like we created in tutorial #2. I named my class test5. Clear and replace the contents of your class with the following code and don’t forget to save.
For this exercise we will be using JDBC in Java which stands for Java Database Connectivity. Clear the existing code in the newly created class except for the package name and paste the following code under the package name.
import java.sql.*; //this import contains the jdbc classes and methods
// JDBC in Java is different from accessessing MYSQL data in PHP
// it is my opinion that Java is more secure and more sophisticated
// I named my class as Test5.....be sure your class starts with whatever name u chose
public class Test5 {
public static void main(String[] args) {
//create a connection object from java.sql package imported above
Connection cn = null;
// create a jdbc driver instance..be sure sqlite jar file is in build path
try {
Class.forName("org.sqlite.JDBC");
System.out.println("The Driver has been loaded successfully!");
}
catch (Exception E1) {
System.out.println("Unable to load the Driver!");
System.out.println("Exceptions:" + E1.toString());
System.exit(1);
}
System.out.println("Establishing connection to Server");
//Establishing the connection with the database schema test.db
try {
cn = DriverManager.getConnection("jdbc:sqlite:test.db");
System.out.println("Connection to Server was Established");
}
catch (Exception E2) {
System.out.println(" Exceptions : " + E2.toString());
}
//now create a table in test.db
try {
Statement stmt = cn.createStatement();
String sql = "CREATE TABLE IF NOT EXISTS test_table (column1 TEXT NULL ,column2 TEXT NULL,column3 TEXT NULL,column4 TEXT NULL) " ;
stmt.executeUpdate(sql);
stmt.close();
//now insert some data
Statement stmt2 = cn.createStatement();
String sql2 = "insert into test_table (column1,column2,column3,column4) values('new', 'data', 'just', 'inserted')";
stmt2.executeUpdate(sql2);
stmt2.close();
} //end of try block
catch (SQLException e) {
System.out.println(" Exceptions : " + e.toString());
} //end catch block
} //end main method
} //end of class
The idea here is to get u up and running right away and then u can study your java code later and learn on your own.
Before running this class we need to download and install the sqlite jar file in the java build path as described in tutorial 3. After doing this, run your class and a new table will be created in our sqlite database with some data inserted.
Download the sqlite jar file from this link
http://www.java2s.com/Code/Jar/s/Downloadsqlitejdbc372jar.htm
And be careful not to press the green 'start now button', but press the actual jar.zip link and the zip file will appear in your downloads area. Extract the contents of zip file to a new file and go back to tutorial #3 for instructions on how to add the jar file to your build path. Then run the program.
Now that we have run our program, a database called test.db will appear in our eclipse workspace. Go back to c:\sqlite folder and copy the sqlite3 file into eclipse workspace. Your configuration should look like this
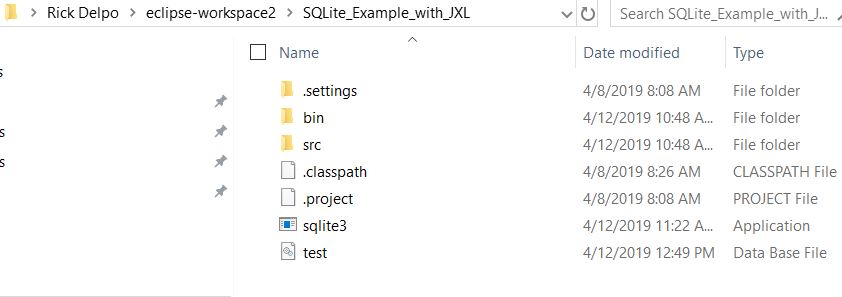
It is very important to be able to search your local computer system to find the path for your eclipse workspace for this step because by default when you execute a main class with sqlite in it the test.db file is embedded directly in our eclipse project.
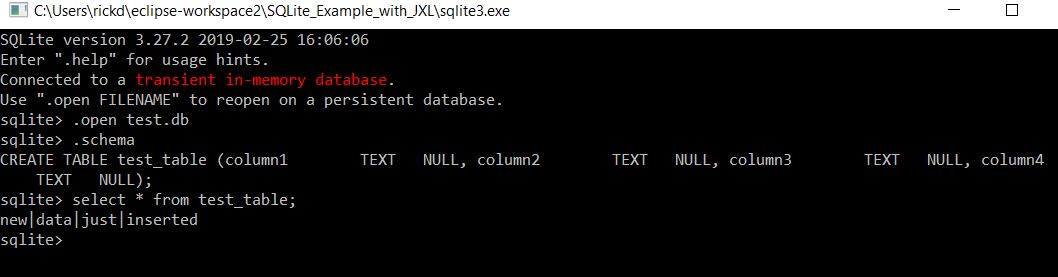
Now let’s open our database manually to find our table and its related data.
Double click on the sqlite3 file inside the eclipse project, then enter .open test.db
Don’t forget to put a dot before the command open. Then enter .schema to show your created tables. Then type select * from test_table; to see the data in the table. Type .exit to exit. Note: that syntax is very important here and it must be typed exactly as explained or an error will result.
Congratulations !!! we have just learned some SQL and Executed it in a Java Application
2024 update, for a very recent version of Eclipse with jre and jdk bundled click on 2024 Eclipse install and follow the instructions. Choose the IDE for Java Developers but if you are doing servlets also install seperately the IDE for Java EE Developers. The MOST IMPORTANT THING here when creating your new project is to click 'use project folder as root for sources and class files' in the Project Layout section. The reason for this is so Eclipse will recognize all our old class files used in this old code I am using. We are only following this instruction for the basic java ide not the servlet section which has different instructions
click here for my servlet instructions my most recent servlet tutorialnext to continue to the next tutorial